There’s a tool out there which helps creating ribbons with custom icons. Google is your friend.
I don’t like tools very much hence I figured it out myself as I like to understand how it works.
Here I explain it plain and simple
HowTo:
Rename your Excel file to filename.xlsm.zip
Double click the new ZIP file. DO NOT Extract, just open!
Create a “customUI” folder
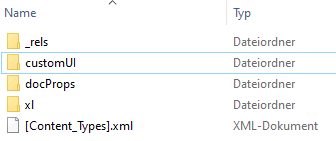
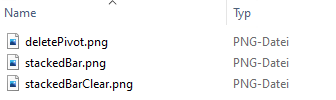
In the customUI folder you add an images folder with your custom images
Then you need to adjust/create some files.
The .rels one in the _rels folder in the root. Here you add the “reference” to your customUI
Something like this
<relationship id="someID" type="http://schemas.microsoft.com/office/2006/relationships/ui/extensibility" target="customUI/customUI.xml">
</relationship>
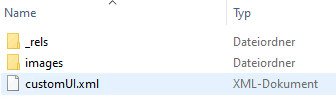
For the second one you create a _rels folder within folder customUI and put a file with filename customUI.xml.rels with following contents in there:
<!--?xml version="1.0" encoding="UTF-8" standalone="yes"?-->
<relationships xmlns="http://schemas.openxmlformats.org/package/2006/relationships">
	<relationship id="deletePivot" type="http://schemas.openxmlformats.org/officeDocument/2006/relationships/image" target="images/deletePivot.png"></relationship>
	<relationship id="stackedBarClear" type="http://schemas.openxmlformats.org/officeDocument/2006/relationships/image" target="images/stackedBarClear.png"></relationship>
	<relationship id="stackedBar" type="http://schemas.openxmlformats.org/officeDocument/2006/relationships/image" target="images/stackedBar.png"></relationship>
</relationships>
The id attribute (in bold), of the image reference, you then need to reference (bold below) those images in the last file we need to create.
This file name customUI.xml within the customUI folder contains the following content
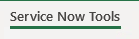
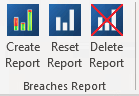
<customui xmlns="http://schemas.microsoft.com/office/2006/01/customui">
	<ribbon>
		<tabs>
			<tab id="CustomTab" label="Service Now Tools">
				<group id="Breaches" label="Breaches Report">
					<button id="createReport" label="Create Report" image="stackedBar" size="large" onaction="createReport"></button>
					<button id="resetReport" label="Reset Report" image="stackedBarClear" size="large" onaction="resetReport"></button>
					<button id="deleteReport" label="Delete Report" image="deletePivot" size="large" onaction="deletePivot"></button>
				</group>
			</tab>
		</tabs>
	</ribbon>
</customui>
I am not 100% sure about the naming conventions of customUI.xml and customUI.xml.rels. I think the .rels file has to begin with the same as the customUI.xml file.
Once all done, remove the .zip ending and open the file in Excel.
The result is this:
The only thing now you need to do is to add “code” in the file (kind of macros), ie. subs with the same name as defined in the customUI.xml in the onAction attributes
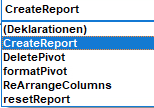
Public Sub CreateReport(ByVal control As IRibbonControl)
Public Sub DeletePivot(ByVal control As IRibbonControl)
Public Sub resetReport(ByVal control As IRibbonControl)
What I then did:
I saved the Excel file as Addin (.xlam). This way I can distribute the file to whom I want, Updates should be kind of a breeze and the buttons are available in EVERY Excel file you load.